Observing a Candle and Pouring a Gas
 In this lab, we began by observing the physical and chemical properties of the small, yellow candle. Physical properties include that it was yellow, striped, and small. Chemical properties were unable to be determined. Then, we recorded new observations after the candle was lit. The physical properties of the lit candle include that it was becoming shorter because of melting, more of the wick was being exposed, and the tip became black. The chemical properties of the candle were that it was burning and melting. For the second part of this lab, we used a larger candle. While it was being lit, we created a mixture of baking soda and vinegar, causing a chemical change in this substance. When we carefully tipped the beaker of the mixture over the flame, it burned out. This was because of the carbon dioxide in the beaker. The candle went through a slight chemical change, because the top was a little charred. The reaction between the carbon dioxide and the flame was a physical change, because the form of the flame changed, for it disappeared.
Roasting a Marshmallow!
 The second experiment was roasting a marshmallow over the bunsen burner. To begin, we observed small marshmallows to determine the physical and chemical properties. Then, we burned larger marshmallows over the burner to create the black char, and the rest was caramel-colored and gooey on the inside. The charred part of the marshmallow tasted bitter and, for lack of a better word, burnt. The remainder of the marshmallow tasted gooey and sweet. The object went through a chemical change, because burning it created the char substance. It also went through a physical change, because of the golden brown color that appeared when the marshmallow was lightly roasted.
Changes of Sugar
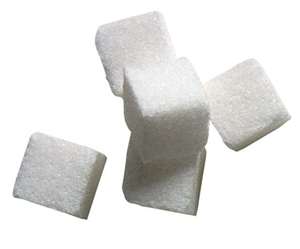 For this lab, we began by observing the four sugar cubes to determine their properties. Then, we were required to crush them with the mortar and pestle until it became a powder. A physical change had taken place because the cube had been broken down, changing form. For the second part of the lab, we began by placing two of the sugar cubes into the test tube and lighting the Bunsen burner. We held the test tube near the burner and watched the sugar burn. Very quickly, it caramelized, turning into a golden-brown color that seemed to be a bubbling liquid. Then, just as quickly, it became black and hard. Shortly after it went through this change, a yellow-colored smoke came out from the test tube, and the process was almost complete. After the test tube took a moment to cool down, Mrs. Rousseau carefully broke the test tube so we could observe it more closely. The black substance took up about half the test tube, taking its shape. The substance was hard, but easy to break, and the texture was exactly the same as the sugar cube. The sugar cube had liquidated, then solidified. It went through physical and chemical changes.
 The labs allowed us to observe changes in physical and chemical property and each built on to our knowledge about changes in states of matter. Overall, it was fun to complete experiments with fire.

